Cut to the chase: 10 tricks to add pace and energy to your edits
Power up your video storytelling with kinetic camera moves, clever cuts and tricks that will keep your audience on the edge of their seats
In video, pace isn’t just about how quickly your narrative moves – it’s about how it feels to your audience. Why do two-hour films like Jaws or The Raid seem to last only half an hour? Because their directors are masters at barrelling the action along. Whether you’re filming a high-octane extreme sports reel, a stylised interview or a dramatic narrative mini-movie, injecting momentum into your footage can make all the difference.
In this guide, we’ll explore cinematic techniques such as the whip pan, jump cut, dolly zoom and more, including how to set them up and when to use them. When put into play with intent, they elevate your storytelling and grip your audience with a punch of visual adrenaline.
1. The whip pan: Move like you mean it
A whip pan (also known as a swish pan) is a rapid pan from one subject or scene to another, creating a motion blur in between. It’s perfect for energetic transitions, revealing surprises or simulating a seamless camera move across different locations. You can also use it to hide an edit from one set up to another.
How to set it up
- Manual execution: Use a fluid tripod head or gimbal. Pan quickly in one direction and stop abruptly. To transition to a second shot, pan into that frame in the same direction and speed.
- Match your movement: The magic lies in the cut. In editing, trim the shots at the blur point and crossfade if needed. Add a subtle swoosh sound effect for emphasis.
- Lighting consistency: For continuity, try to match exposure and light direction across both scenes.
When to use it
Whip pans are perfect for action sequences, time jumps, comedy reveals or to simulate quick travel between places. Overused, they can become a gimmick – but when well-timed they bring a real stylistic swagger.
On screen: Scott Pilgrim vs. The World (2010)
British director Edgar Wright is the modern master of the whip pan. In Scott Pilgrim, whip pans are used not just to create energy but to add momentum between jokes, scenes and even dimensions. Watch how the camera darts around in the music battle scenes or transitions between rooms – it’s a kinetic visual language that Wright uses to propel the story.
Scott Pilgrim vs. The World (2010)
Check out this scene from Edgar Wright, where he throws the kitchen sink at the action, and nails it

2. Jump cuts: Break the frame to keep things snappy
Jump cuts are intentional disruptions in time and space, cutting between two similar shots where the subject has clearly moved – no smoothing over. When used correctly, they jolt the scene’s rhythm and create an urgency or stylistic tension. Used well, they can really keep your audience on its toes.
How to set it up
- Static camera: Frame a locked shot, like a person talking or performing an action.
- Film a long take: Let the action play out naturally.
- Edit selectively: In post, hack into the footage, strip pauses out, cut off sentence endings etc. The change in position (or body language) this editing reveals is what creates the ‘jump’.
- You can also film the same scene twice and jump between the two very subtly different takes.
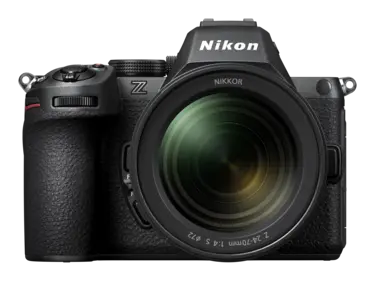
- If your camera has hi-res performance, such as 8K or 6K (such Z8 or Z6III), you can use that flexibility to also zoom into the image with the cut, putting your viewer closer to the action, which can be very (deliberately) disorientating.
When to use it
Things seem a little static? Worried your audience getting a little settled? Mix it up with a jump cut for a little edge.
On screen: Breathless (1960)
At the movies: Jean-Luc Godard’s French New Wave classic practically invented the modern jump cut. Watch Michel driving and talking in the car – Godard cuts through a single take, breaking continuity but adding raw, poetic rhythm.
Influencer style: Vloggers and YouTubers often also use jump cuts extensively to keep the momentum, and so audience engagement is high. Get those likes!
Breathless - À bout de souffle (1960)
Jean-Luc keeps everyone on their toes with his fast cuts

3. Dolly zoom: The mind-bender
Also known as the ‘Vertigo effect’ (after the Hitchcock film), a dolly zoom creates a surreal sense of spatial distortion by zooming in while physically dollying the camera backwards – or vice versa. The subject stays the same size while the background morphs and warps around them.
How to set it up
- Gear needed: A zoom lens and a slider/dolly.
- Motion control: Move the camera steadily while zooming in or out at the same rate in the opposite direction.
- Practice timing: You may need several takes to get the sync right between movement and zoom. In fact you definitely will. It’s a real skill to pull this off, so as ever, the answer is practice.
When to use it
Emotional or psychological moments – shock, realisation, dread. It’s cinematic gold when you want to visually show that a character’s world is collapsing or shifting.
On screen: Jaws (1975)
The daddy of the dolly zoom shot: Chief Brody on the beach sees what he thinks is a shark attack, and the world pulls away behind him while he stays fixed. Steven Spielberg used the technique to express internal panic and realisation and, in doing so, he created an all-time classic of cinema. The dolly zoom is also the neat trick in Severance that helps establish when a character changes from an ‘inny’ to an ‘outy’.
Jaws (1975)
No one will ever top this!

4. Match cuts: Creating visual rhymes
Match cuts are seamless transitions between two similar shapes, movements or frames. Think of someone jumping in the air and cutting to a ball flying through the sky in the same arc. These create visual flow and elevate your edit with hidden geometry.
How to set it up
- Plan the shots: Look for shapes, actions, or objects that echo each other.
- Frame precisely: Shoot with the intention of cutting on that match. Watch your footage back on set – is the framing and speed through the shot correct? You don’t want to come back!
- Use speed ramps (speeding up or slowing down footage) or masks: These can help blend disparate footage more smoothly.
When to use it
Creative storytelling, thematic symbolism and slick transitions in music videos or brand films.
On screen: 2001: A Space Odyssey (1968)
Another master director when it comes to thinking ahead to the edit suite, the bone-to-satellite cut is one of the most iconic in cinema history. After a prehistoric ape throws a bone in the air, Stanley Kubrick cuts to a satellite falling through space, covering millions of years of history in a single cut!
2001: A Space Odyssey (1968)
Skipping ahead with Stanley

5. Smash cuts: Shifting the senses
A smash cut throws the viewer from one emotional state to another: calm to chaos, soft to loud. It’s all about contrast and surprise. No way your audience can nod off if you pull one of these out your edit bag.
How to set it up
- Contrast elements: Juxtapose two opposite scenes – for example, a meditative peaceful moment cut to a gunshot or scream.
- Use sound deliberately: Silence makes the smash cut way more powerful.
When to use it
It’s a great way to change the rhythm or dynamics of the movie. Even in your vlogs – change from a peaceful scene on a sunset beach to a ride on board with a jet ski at full tilt. Gnarly!
On screen: Trainspotting (1996)
Danny Boyle masterfully uses smash cuts, such as the abrupt jump from Renton sinking into a disgusting toilet to him suddenly floating in dreamlike pure water – such a great way to throw a curve ball at your audience.
6. L-cuts and J-cuts: Seamless audio transitions keep things flowing
It’s not just visuals that provide flow to your edits. In an L-cut, the audio from the first scene continues over the start of the second. In a J-cut, the audio from the next scene starts before the visual does. These are subtle but hugely effective for narrative flow and maintaining energy between scenes.
How to set it up
- Use J-cuts to lead into new environments or dialogue before the cut.
- Use L-cuts to add emotional resonance or give breathing room to a scene that’s just ended.
They’re invisible editing techniques that make a film feel professionally put together – even when no one’s consciously aware they’re happening. Film noir made an art of the overlapping voiceover to keep dramatic tension as scenes unfolded.
When to use it
It’s a great way to join scenes in the audience’s mind, either by lingering on the last with audio, or foreshadowing the scene to come.
On screen: The Social Network (2010)
David Fincher’s editing is full of J- and L-cuts that carry dialogue and atmosphere between scenes. The rowing race sequence cuts visually to Harvard, but the music and sound bleed over, keeping tension flowing.
The Social Network (2010)
Despite the huge location jump (Henley to Harvard) everything is seamless thanks to audio

7. Let’s do the time warp: Ramp up (or down) your footage
Changing the speed of your footage mid-shot can dramatically affect pace. Slow motion can highlight a moment, while a ramp up to fast-forward adds real momentum.
How to set it up
- Shoot high frame rate: 60fps or higher gives you room to play.
- Use speed curves in post: Apps like Final Cut Pro, Premiere Pro, or DaVinci Resolve allow custom speed graphs to change your frame rate over time. Apple Motion is brilliant for this.
- Anchor to the beat: Speed ramps synced to music cues are incredibly effective, think of the sound of a diver’s splash suddenly slowing down as they enter the water.
When to use it
It helps the audience focus on key moments, a sword strike for example, when the action is hurtling past them, it’s also a way to NOT cut, creating dynamism by making a single take become time-elastic rather than actual edits.
On screen: 300 (2006)
Zack Snyder uses speed ramps to emphasise every sword swing and spear throw. Watch the Persian battle scenes – action speeds up and slows down dynamically, creating rhythm and hyper-realism. It’s disorientating and totally immerses the audience in the chaos of battle.
8. Snap zooms and digital push-ins
Quick zooms (whether optical or digital) can simulate urgency or drama. A digital push-in in post-production, especially in 4K footage, can add emphasis without needing a zoom lens, just like we explored in our jump cuts.
How to set it up
- Snap zooms: Use a zoom lens and manually zoom fast during the shot. Ideal for comedic emphasis or action.
- Digital punch-ins: Scale your shot in post (no more than 110–120% to avoid quality loss).
When to use it
Mockumentary-style edits, music videos or product reveals.
On screen: The Office (US series)
This mockumentary-style show uses quick snap zooms for comedic timing and to ‘catch’ reactions. Think of Jim’s knowing glances at the camera, breaking the ‘fourth wall’ – snap zooms emphasise the awkwardness or absurdity.
The Office
The snap zoom has become its own thing…

9. Crash zoom transitions
Zoom transitions simulate the camera punching in or out across scenes, usually using blur or motion trails to hide the cut.
How to set it up
- In-camera zoom or digital: Either shoot with zooms or simulate them with editing tools, using that extra 6K/8K resolution headroom to work in later. Watch out for those huge file sizes, though!
- Add motion blur: This can really ‘sell’ the transition to the viewer.
- Sync with music or movement: These are ten times more effective when married to a sound or FX. Again, it ‘sells’ a dramatic and unnatural edit as the real thing.
When to use it
A hugely kinetic effect to propel action and viewpoint, throw your viewer into that fight scene, jump universes in a single edit, don’t put your audience on the edge of their seat, drag them out of it.
On screen: Everything Everywhere All At Once (2022)
Directors The Daniels (Kwan and Scheinert) make brilliant use of crash zooms and high-speed transitions to help the story, and the viewer, hop around this movie’s hotch-potch of multiple universes. Scenes slam together with dizzying energy and zoom transitions (often digitally enhanced) amplify the surreal and chaotic plot.
Everything Everywhere All At Once
What it lacked in budget, it made up for in energy and invention, and the crash zoom was the key to its dimension hopping mayhem

10. Crossfades, wipes and glitches
These classic transitions still have their place – especially if stylised. Crossfades are great for emotional tone, while digital wipes or glitches are excellent for futuristic or raw aesthetics.
Avoid just plucking out a default transition in your edit. Great transition plug-ins will have ways to tune your transitions to further match your footage – DataMosh, for example, is a great a glitch plug-in from Motion VFX for super-glitchy digital mashups. As ever, the best presets are the ones in your library.
How to use it
Modern editing plug-ins will be full of modern glitch effects like digital noise and wipe transitions. I’m a big fan of 16mm analogue glitches like film-burn and light leaks.
When to use it
Wipes are quite an old-school move, so it can add real retro flavour to a scene. Film-style glitches add a great analogue texture to edits, whilst digital style break-ups add a real bleeding edge-feel to modern movies.
The crossfade, or dissolve, is the go-to for gentle transitions between scenes.
On screen: Star Wars (1977)
George Lucas’ Star Wars uses custom wipes and crossfades to move between planets and storylines. The vintage nature contrasting with the incredible leap into the future of the first film made the original Star Wars feel cinematic and epic. They also echoed the original sci-fi matinee classics like Flash Gordon, making them feel familiar and timeless. They’ve become part of the visual identity of Star Wars productions and are still present in the current TV series nearly half a century later.
Star Wars
Star Wars loves a wipe edit!

Putting it all together
A high-energy edit isn’t just made with fast cuts and flashy effects. It’s a balance of rhythm, intention and control.
Think of it like music: moments of tension and release, tempo changes and emotional crescendos are what make a great song so memorable.
So when planning your next shoot, consider how you’ll edit as you film. Each move you capture – whether it’s a whip pan, a jump cut or a dolly zoom – should be there to serve the feeling of the scene.
The biggest thing in all this is that it’s so much fun! When you’ve planned a move, zoom or transition and captured it on set, you’ll find yourself running home to the edit suite to put it all together.
Of course, you might overdo it – some won’t turn out how you planned, some will stay on the cutting room floor – but don’t get disheartened. Bring the energy and set that emotion in motion.
BTS with the Nikon Z5II
The gear behind the scenes
To pull off the high-octane moves above, the right accessories make a world of difference. Here’s a short list of add-ons that can transform your efforts into smooth, cinematic magic.
1. Fluid tripod head
Allows buttery-smooth pans and tilts without those jerky stops.
Best for: Whip pans, smooth tilts, match cuts.
2. Gimbal
Stabilises handheld footage for walking shots, orbit moves or dolly-style tracking. One of the greatest inventions for the solo videographer ever, as before that it was just Steadicam, which cost thousands and gave you terrible backache!
Best for: Speed ramps, dolly replacements, parallax effects. Getting in the action.
3. Motorised sliders and tracks
Enable repeatable and precise tracking or push/pull movements.
Best for: Dolly zooms, product shots, high-end parallax reveals.
4. Zoom lenses with great control
Let you perform real-time zooms, such as snap zooms or dolly zooms.
Best for: Vertigo effect, crash zooms, fast reframing.
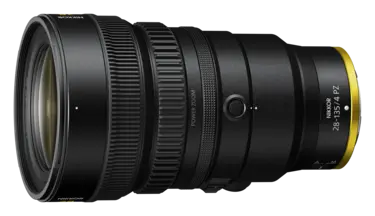
These effects can be achieved with manual zooms or you could also check out the new NIKKOR Z 28-135mm f/4 PZ power zoom lens, with 11 different zoom speeds.
5. ND filter
Controls exposure in bright light so you can shoot with wide apertures for shallow depth of field – even outside.
Best for: Stylised slow-motion and cinematic bokeh that looks great when it moves.
6. Audio recorder + Lavalier mic
Keep your dialogue clean even when your visuals are chaotic.
Best for: L- and J-cuts, dynamic location work, talking-head sequences with motion.

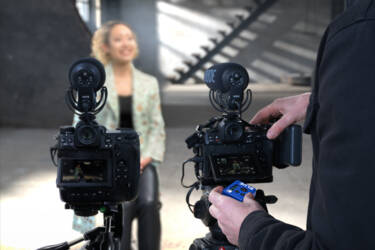
Wireless mics means your subject can move around and interact with their surroundings. Mattia runs through his tasting routine at Vineria del Carmine. Good in-ear or closed-back headphones will help you spot any unwanted noise as you shoot. ©Dom Salmon
Final cut: The two hats creator
Great edits start before you hit record. Planning a whip pan transition? Film both ends. Want to add speed ramps? Shoot at a high frame rate. Need a dolly zoom? Bring the right gear.
Great directors put the edit together in their head and never paint themselves into a corner with their footage.
So keep your director’s hat on, but don’t forget to add ‘editor’ in brackets, too – because every movement is a choice. When you’re intentional with those choices, your edits become more than just cuts, they become choreography.
More in videography
More from Dom Salmon
Unlock greater creativity
